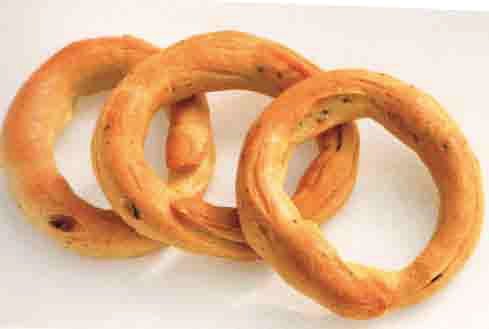
Taralli Napoletani: Neapolitan Salty Ring Cookies
In southern Italy, taralli come in many sizes and flavors. These are typical Neapolitan ones sometimes referred to in Neapolitan dialect as scaldatelli – little boiled things.
Makes about 30 taralli
3/4 cup warm water, about 110˚F
2 1/2 teaspoons (1 envelope) active dry yeast
1/4 cup olive oil
3 cups unbleached all-purpose flour (spoon flour into dry-measure cup and level off)
2 teaspoons salt
1 tablespoon fennel seeds
1 teaspoon coarsely ground black pepper
2 large rectangular cooling racks, turned upside down and lightly oiled
For the dough, pour the water into a bowl and whisk in the yeast. Whisk in the oil.
Put the remaining ingredients in the bowl of a food processor fitted with the metal blade. Pulse several times to mix. Add the liquid and pulse again until the dough forms a ball. Let the processor run continuously for about 10 seconds to knead the dough.
Invert the dough to an oiled bowl and carefully remove the blade. Turn the dough over so that the top is oiled and cover the bowl with plastic wrap. Let the dough rise at room temperature until it doubles in bulk, about 1 hour.
After the dough has risen, scrape it out of the bowl to a lightly floured work surface and use a bench scraper or knife to cut it into 2 equal pieces. Roll each piece of dough under the palms of your hand to a 6-inch cylinder. Roll one of the cylinders to a 5-inch length and cut into 1-inch pieces. Repeat with the remaining pieces of dough to make 30 equal pieces in all.
One at a time, roll each piece of dough under the palms of your hands to make an 8-inch strand. Join the ends together to make a circle, pressing firmly to seal. Line up the formed taralli on a lightly floured work surface or floured jelly-roll pans, making sure they do not touch each other.
Set racks in the upper and lower thirds of the oven and preheat to 375˚F.
Fill a large pot (such as one in which you would cook pasta) 3/4 full of water. Bring the water to a full rolling boil. Set one of the oiled cooling racks on the stovetop (put a pan under it to catch drips) next to the pan of boiling water. Drop the taralli, 6 or 8 at a time, into the boiling water and remove them with a skimmer as soon as they float to the surface. Arrange the taralli about 1 inch apart in all directions, on the prepared rack. Repeat until all of the taralli have been boiled and arranged on the racks.
Bake the taralli until they are golden and crispy, about 30 minutes. About halfway through baking, move the rack from the upper third of the oven to the lower third, and the rack from the lower third to the upper third. Cool the taralli on the racks they baked on.
Serving: The traditional accompaniment to taralli is a glass of wine. You may serve them as hors d’oeuvres or as a snack.
Storage: After the taralli have cooled completely, store them in a tin or plastic container with a tight-fitting cover. They last almost indefinitely.
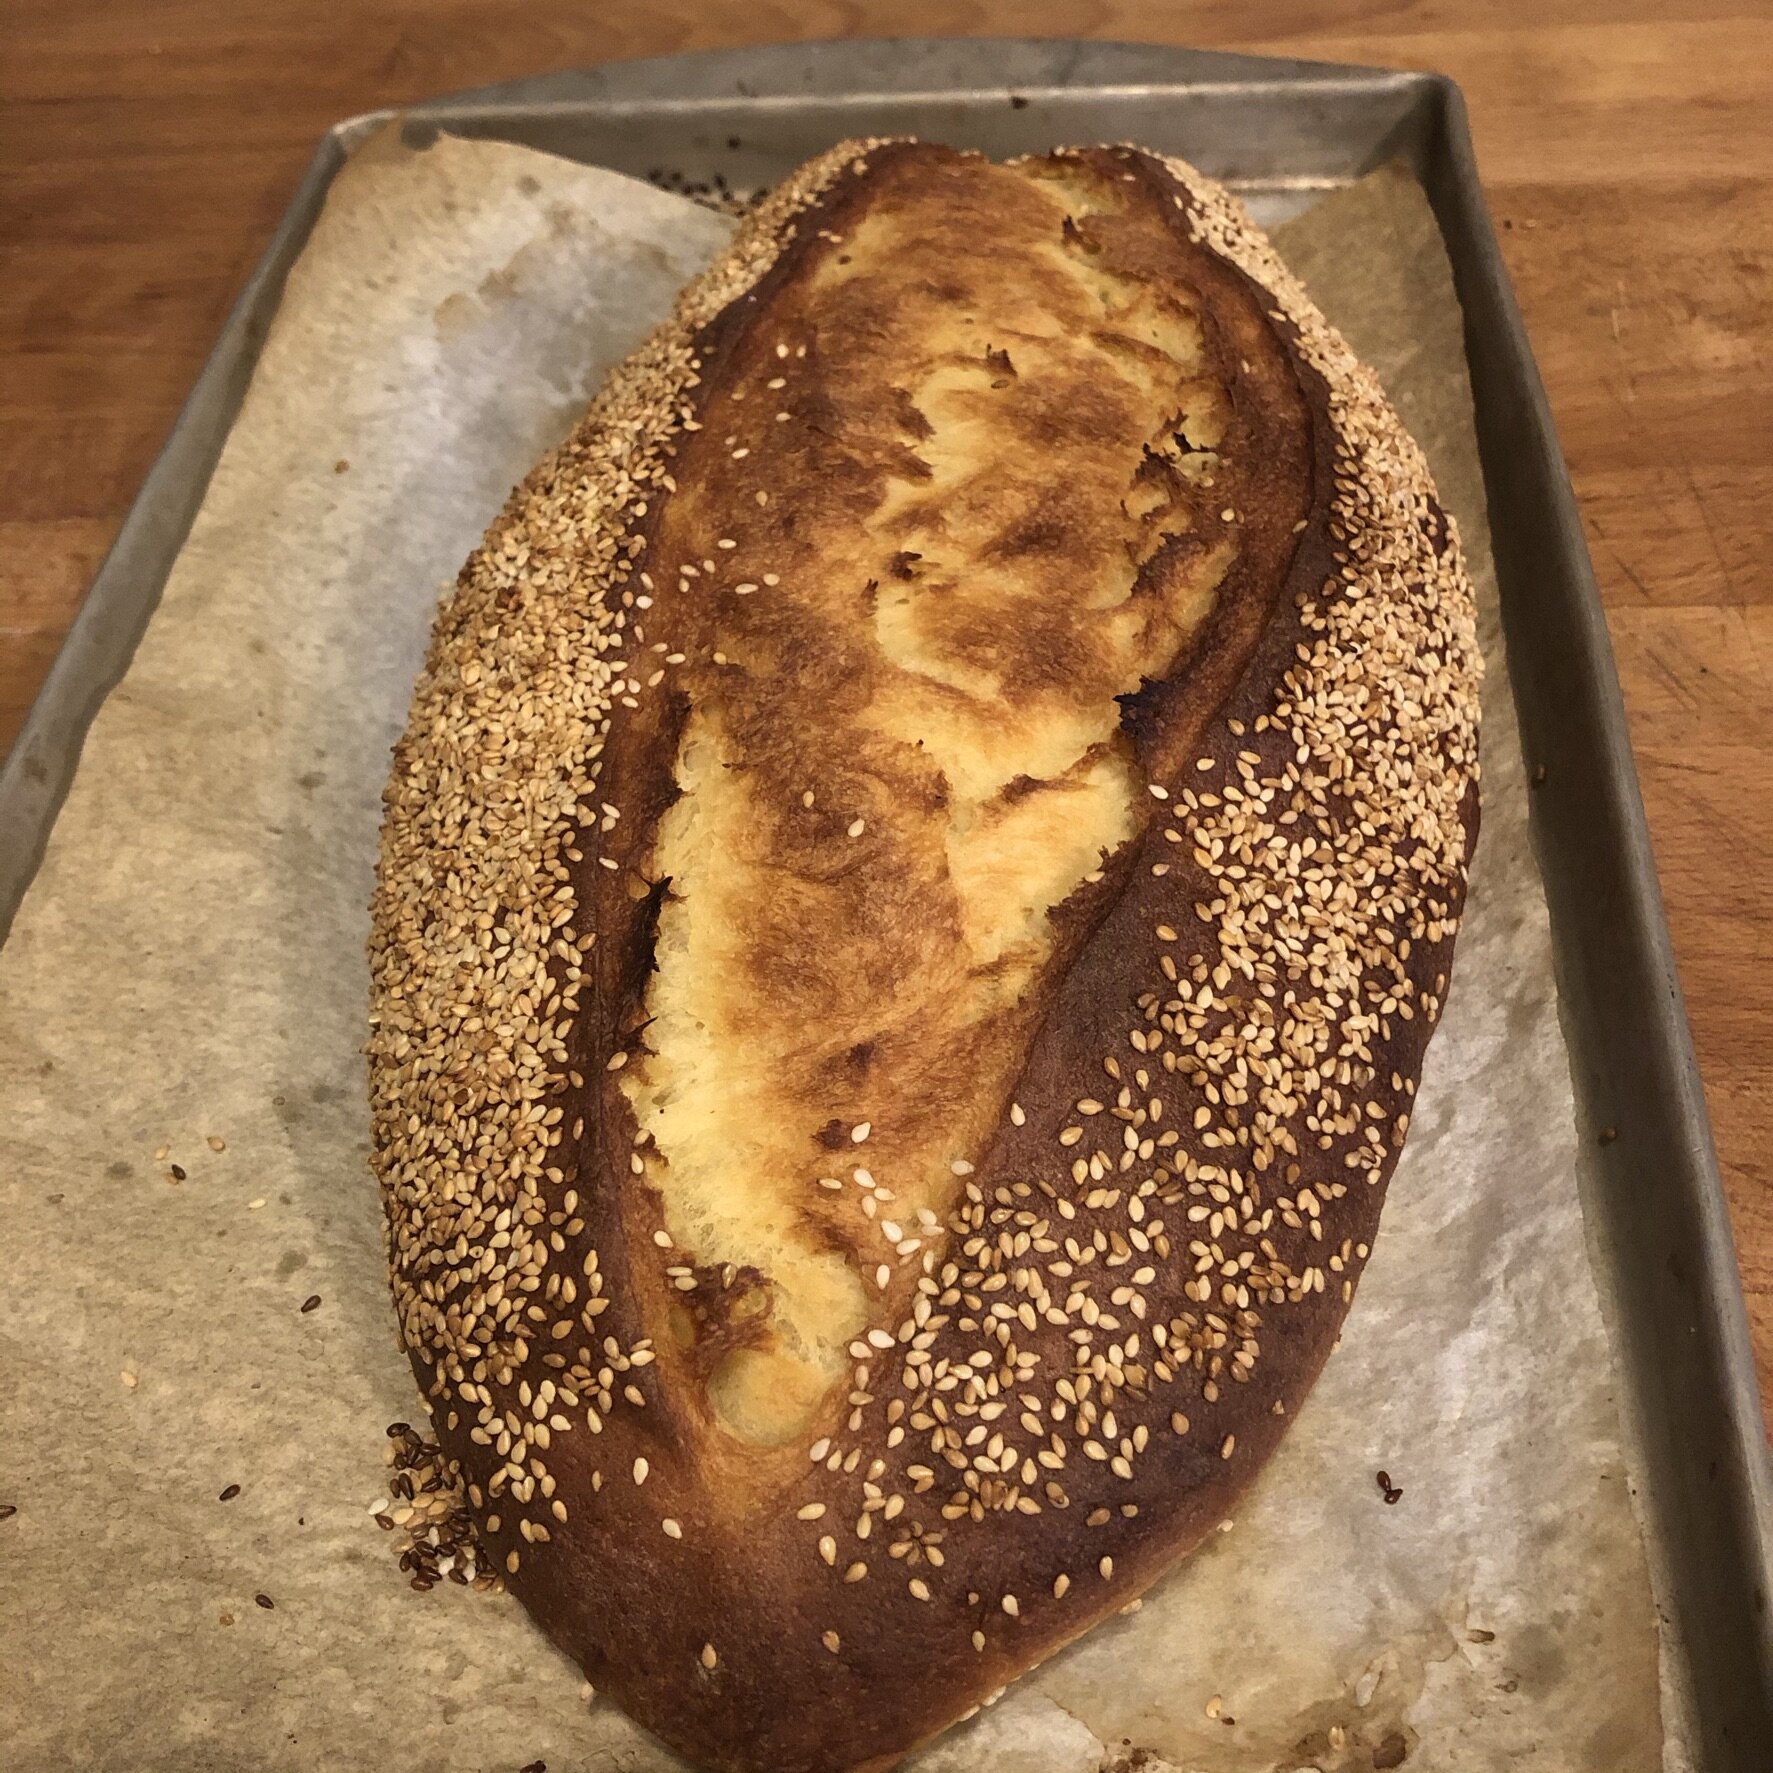
Sicilian Semolina Bread
Pane di Semolina Rimacinata
This bread cannot be made using granular semolina which is too coarse. The correct ingredient is durum flour called semolina rimacinata (re-milled semolina) in Italian. Durum flour and semolina rimacinata are both available online.
One 15-inch long loaf
400 grams tepid water
2 teaspoons/6 grams instant yeast
1 teaspoon honey or malt syrup
500 grams durum flour
1 1/2 teaspoons/9 grams additive free fine sea salt
Sesame seeds for finishing.
A cookie sheet or jellyroll pan cover with parchment
Whisk the water, yeast and honey together in the bowl of a stand mixer. Use a silicon spatula to stir in the flour, making sure to scrape away any flour clinging to the side of the bowl.
Place the bowl on the mixer with the dough hook and mix on low speed for 5 minutes.
Increase the speed to medium and sprinkle in the salt; continue mixing for 2 minutes longer.
Scrape the dough to an oiled bowl and turn it over so that the top is oiled. Cover with plastic wrap or a towel and let the dough ferment for 1 hour.
Scrape the dough to a floured surface and give it a turn: flatten the dough and fold one side over the middle and the other side over both; roll down from the top. Turn the dough 90 degrees and repeat. Return the dough smooth side upward to the bowl and cover. Let ferment until fully double, about 45 minutes.
Invert smooth side downward to a lightly floured surface and gently press the dough to deflate. Roll down from the top to form a classic batard shape. Before reaching the end, fold the flap upward and pinch it into place. Invert the loaf, smooth side down, and keeping the middle the tallest point, roll gently with both hands toward the ends, gently pointing the ends. Carefully lift the loaf to the prepared pan and cover it; let the loaf proof until it is almost double, about 40 minutes.
About 15 minutes before the loaf is fully risen, set racks in the middle and lower level of the oven and preheat to 550 degrees. Place a small pan (to hold water and make steam) on the bottom rack.
Use the blade to cut a slash down the length of the loaf. Spray the dough with water and carefully sprinkle the sesame seeds on the loaf, avoiding letting any fall into the scored area.
Place the pan in the oven, also adding water (avert your face) to the bottom pan.
Wait 5 minutes and spray again. Continue baking for 15 minutes.
Open the oven and decrease the temperature to 425 degrees. Continue baking until the loaf is dark golden and the internal temperature is 200 degrees, 10 to 15 minutes longer.
Cool the loaf on a rack and serve the same day or wrap and freeze for longer storage. Reheat at 350 degrees for 15 minutes and cool before serving.
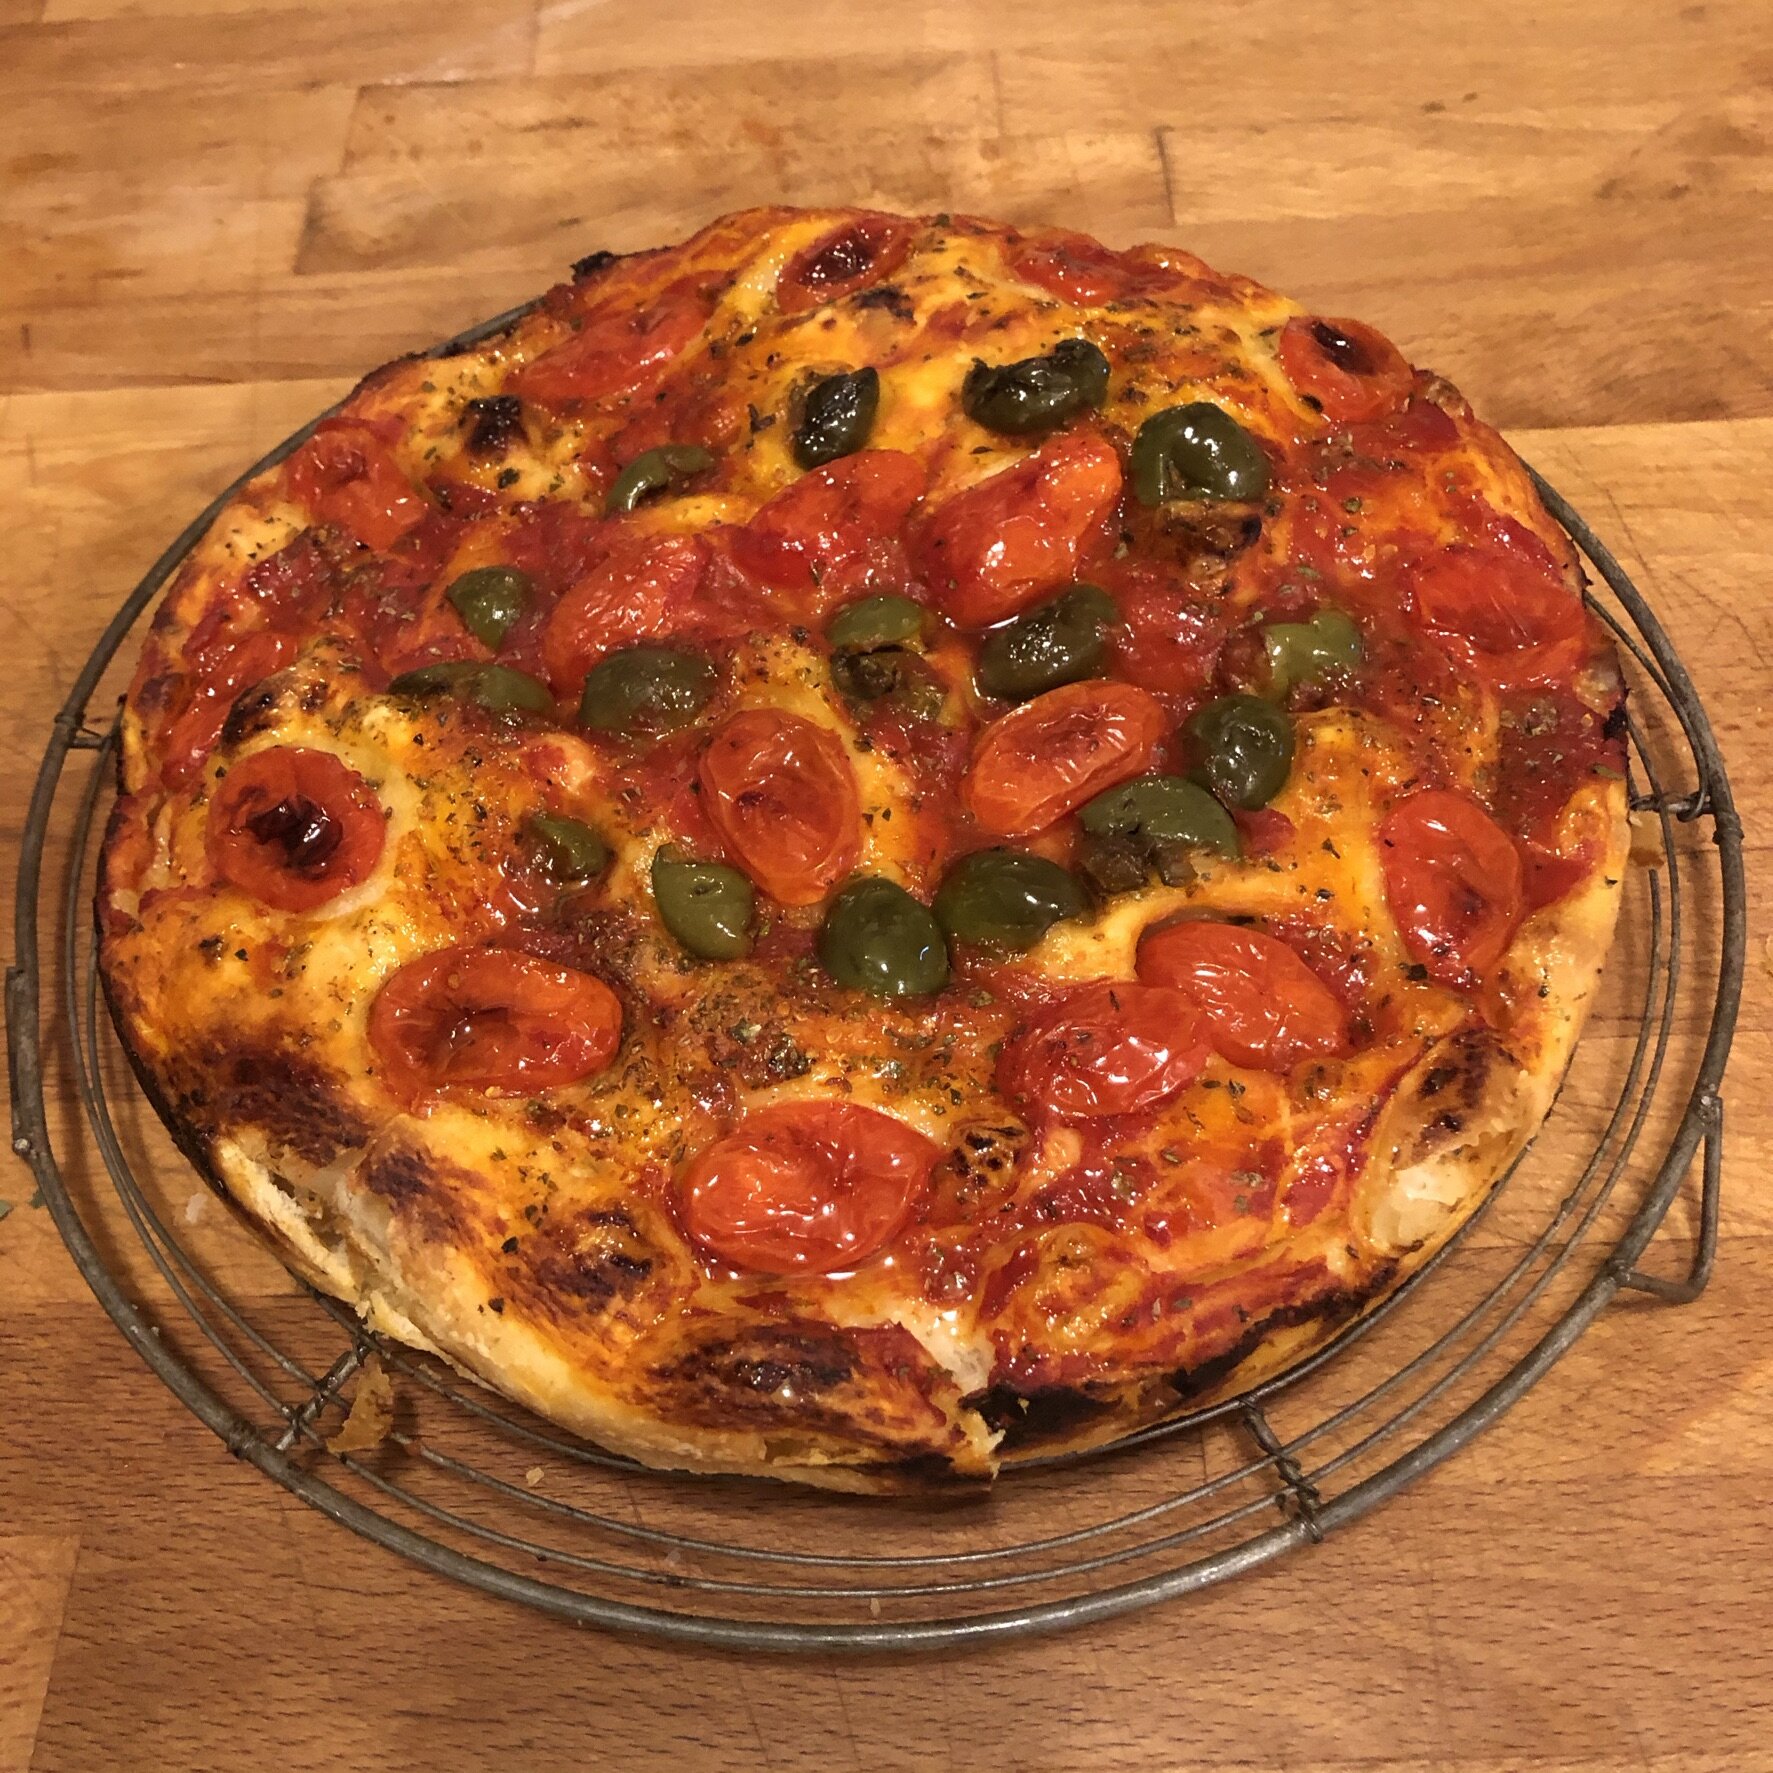
Focaccia alla Barese, a typical seaside snack in Bari
Almost everyone in Bari has “the one and only really authentic and true” recipe for this: some use a mix of all-purpose and durum flours, others use warm pureed potatoes in the dough, and some even suggest that the dough has to be leavened by sourdough starter.
This is a delicious version with no claims to authenticity.
One 10-inch diameter focaccia, about 6 servings
DOUGH
200 grams warm water
1 1/2 teaspoons instant yeast
255 grams unbleached bread flour
1 teaspoon fine sea salt
TOPPINGS
1/3 cup thick tomato puree
Fine sea salt and dried oregano for sprinkling
1 1/2 cups cherry tomatoes, rinsed and halved across the equator
3/4 cup green Castelvetrano olives, pitted and halved
“EMULSION”
1/4 cup water
3 tablespoons olive oil
One 10-inch round pan, 2 inches deep, seasoned (see below) and generously oiled
For the dough, whisk the yeast and water together in a mixing bowl; sprinkle the flour and salt over the water. Use a rubber spatula to beat the dough for a minute, and then cover with plastic wrap. Let the dough ferment until it is fully double.
Set a rack in the lowest level of the oven and preheat to 500 degrees.
Without deflating it too much, scrape the dough into the prepared pan. Turn the dough over and press it into the pan.
Spread the tomato puree on the dough. Sprinkle with salt and oregano.
Arrange the cherry tomato halves on the dough, squashing them slightly between your fingers before gently pressing them on the dough. Make a couple of concentric circles with the tomatoes. Make a couple of rows of olives in between.
Use a fork to beat the water and oil together and pour it just inside the pan and on all the perimeter of the focaccia.
Place the pan in the oven and bake for 15 minutes. Decrease heat to 425 degrees, move the focaccia to the middle level, and continue baking until the focaccia is well done on the bottom and until some of the tomatoes have slightly charred, about 20 minutes longer.
Slide the focaccia from the pan to a rack to cool and serve at room temperature or reheat.
NB: Generously brush the pan with olive oil and bake at 350 for 10 minutes to season. Cool the pan, wipe it well, and oil it again.
Checkerboard Cookies
These are as intriguing looking as they are easy to prepare. Use even light pressure when rolling the doughs and perfect checkerboards will be your reward.
Makes about 100 cookies
1 batch Vanilla Sablé dough, below
1 batch Chocolate Sablé dough, below
1 large egg white, beaten with a fork until very liquid
3 or 4 cookie sheets or jellyroll pans lined with parchment or foil

Prepare and chill the doughs.
Roll each dough to an 8 x 12-inch rectangle, slide it onto a cookie sheet and chill until firm again.
Remove the vanilla dough from the refrigerator, paint it with the egg white and slide the chocolate dough onto it. Place a cookie sheet on the stacked dough and press gently to make them adhere.
Cut the layered stack of dough in half to make two 8 x 6-inch rectangles. Paint with egg white, stack, and press as above.
Chill the striped dough again.
Cut across the 6-inch side of the dough to make 3/8-inch slices. Set one of the slices on the work surface, stripes facing upward and paint with the egg white. Arrange another slice on it, making sure the colors of the dough alternate, as in the illustration. Repeat with 2 more slices of dough. Repeat with the remaining slices of dough, stacking them 4 layers high as the first one – you will have 4 stacks of dough when you are finished. Wrap and chill the formed checkerboards until you are ready to bake them.
Slice, bake, and store as for either of the recipes above.
VANILLA SABLÉS
These versatile cookies may be baked plain, with any of the variations listed at the end of the recipe, or as a component of checkerboard cookies, the last recipe.
Makes about 40 cookies
12 tablespoons (1 1/2 sticks) unsalted butter, softened
1/3 cup sugar
1 teaspoon vanilla extract
1 large egg yolk
1 1/2 cups all-purpose flour (spoon flour into dry-measure cup and level off)
2 cookie sheets or jellyroll pans lined with parchment or foil
Combine the butter and sugar in the bowl of an electric mixer. Beat with the paddle on medium speed until lightened, about 5 minutes. Beat in the vanilla and egg yolk and continue beating another 2 minutes.
Remove the bowl from the mixer and fold in the flour by hand.
Scrape the dough to a floured surface and roll it under the palms of your hands to a cylinder, about 10 inches long and 2 inches in diameter. Wrap the dough in plastic wrap and chill it until firm, an hour or two or up to several days. (If you intend to make the checkerboard cookies, shape the dough into a square, wrap it in plastic, and chill.)
When you are ready to bake the cookies, set racks in the upper and lower thirds of the oven and preheat to 350 degrees.
Place the roll of cookie dough on a cutting board and use a sharp knife to cut it into 1/4-inch slices. Arrange them on the prepared pans about an inch apart in all directions.
Bake the cookies for about 12 to 15 minutes, until they are firm and very light golden.
Cool the cookies in the pans on racks and pack them between sheets of wax paper in a tin or plastic container with a tight-fitting cover.
VARIATIONS
Lightly beat the leftover egg white with a fork and paint the outside of the chilled roll of dough with it. Roll the cylinder of dough in sugar, or coarse colored sugar before slicing and baking
Add 1 1/2 cups coarsely chopped walnut or pecan pieces to the dough along with the flour.
CHOCOLATE SABLÉS
These are made from slightly different proportions from the vanilla ones to make up for the drying effect of the cocoa powder.
Makes about 40 cookies
1 1/2 cups all-purpose flour (spoon flour into dry-measure cup and level off)
1/3 cup alkalized (Dutch process) cocoa powder, sifted after measuring
1/2 teaspoon baking soda
1/8 teaspoon salt
8 tablespoons (1 stick) unsalted butter, softened
1/2 cup sugar
1 teaspoon vanilla extract
1 large egg
2 cookie sheets or jellyroll pans lined with parchment or foil
Stir the flour together with the cocoa, baking soda, and salt.
Combine the butter and sugar in the bowl of an electric mixer. Beat with the paddle on medium speed until lightened, about 5 minutes. Beat in the vanilla and egg and continue beating another 2 minutes.
Remove the bowl from the mixer and fold in the flour mixture by hand.
Scrape the dough to a floured surface and roll it under the palms of your hands to a cylinder, about 10 inches long and 2 inches in diameter. Wrap the dough in plastic wrap and chill it until firm, an hour or two or up to several days. (If you intend to make the checkerboard cookies, shape the dough into a square, wrap it in plastic, and chill.)
When you are ready to bake the cookies, set racks in the upper and lower thirds of the oven and preheat to 350 degrees.
Place the roll of cookie dough on a cutting board and use a sharp knife to cut it into 1/4-inch slices. Arrange them on the prepared pans about an inch apart in all directions.
Bake the cookies for about 12 to 15 minutes, until they are firm and dull in appearance.
Cool the cookies in the pans on racks and pack them between sheets of wax paper in a tin or plastic container with a tight-fitting cover.
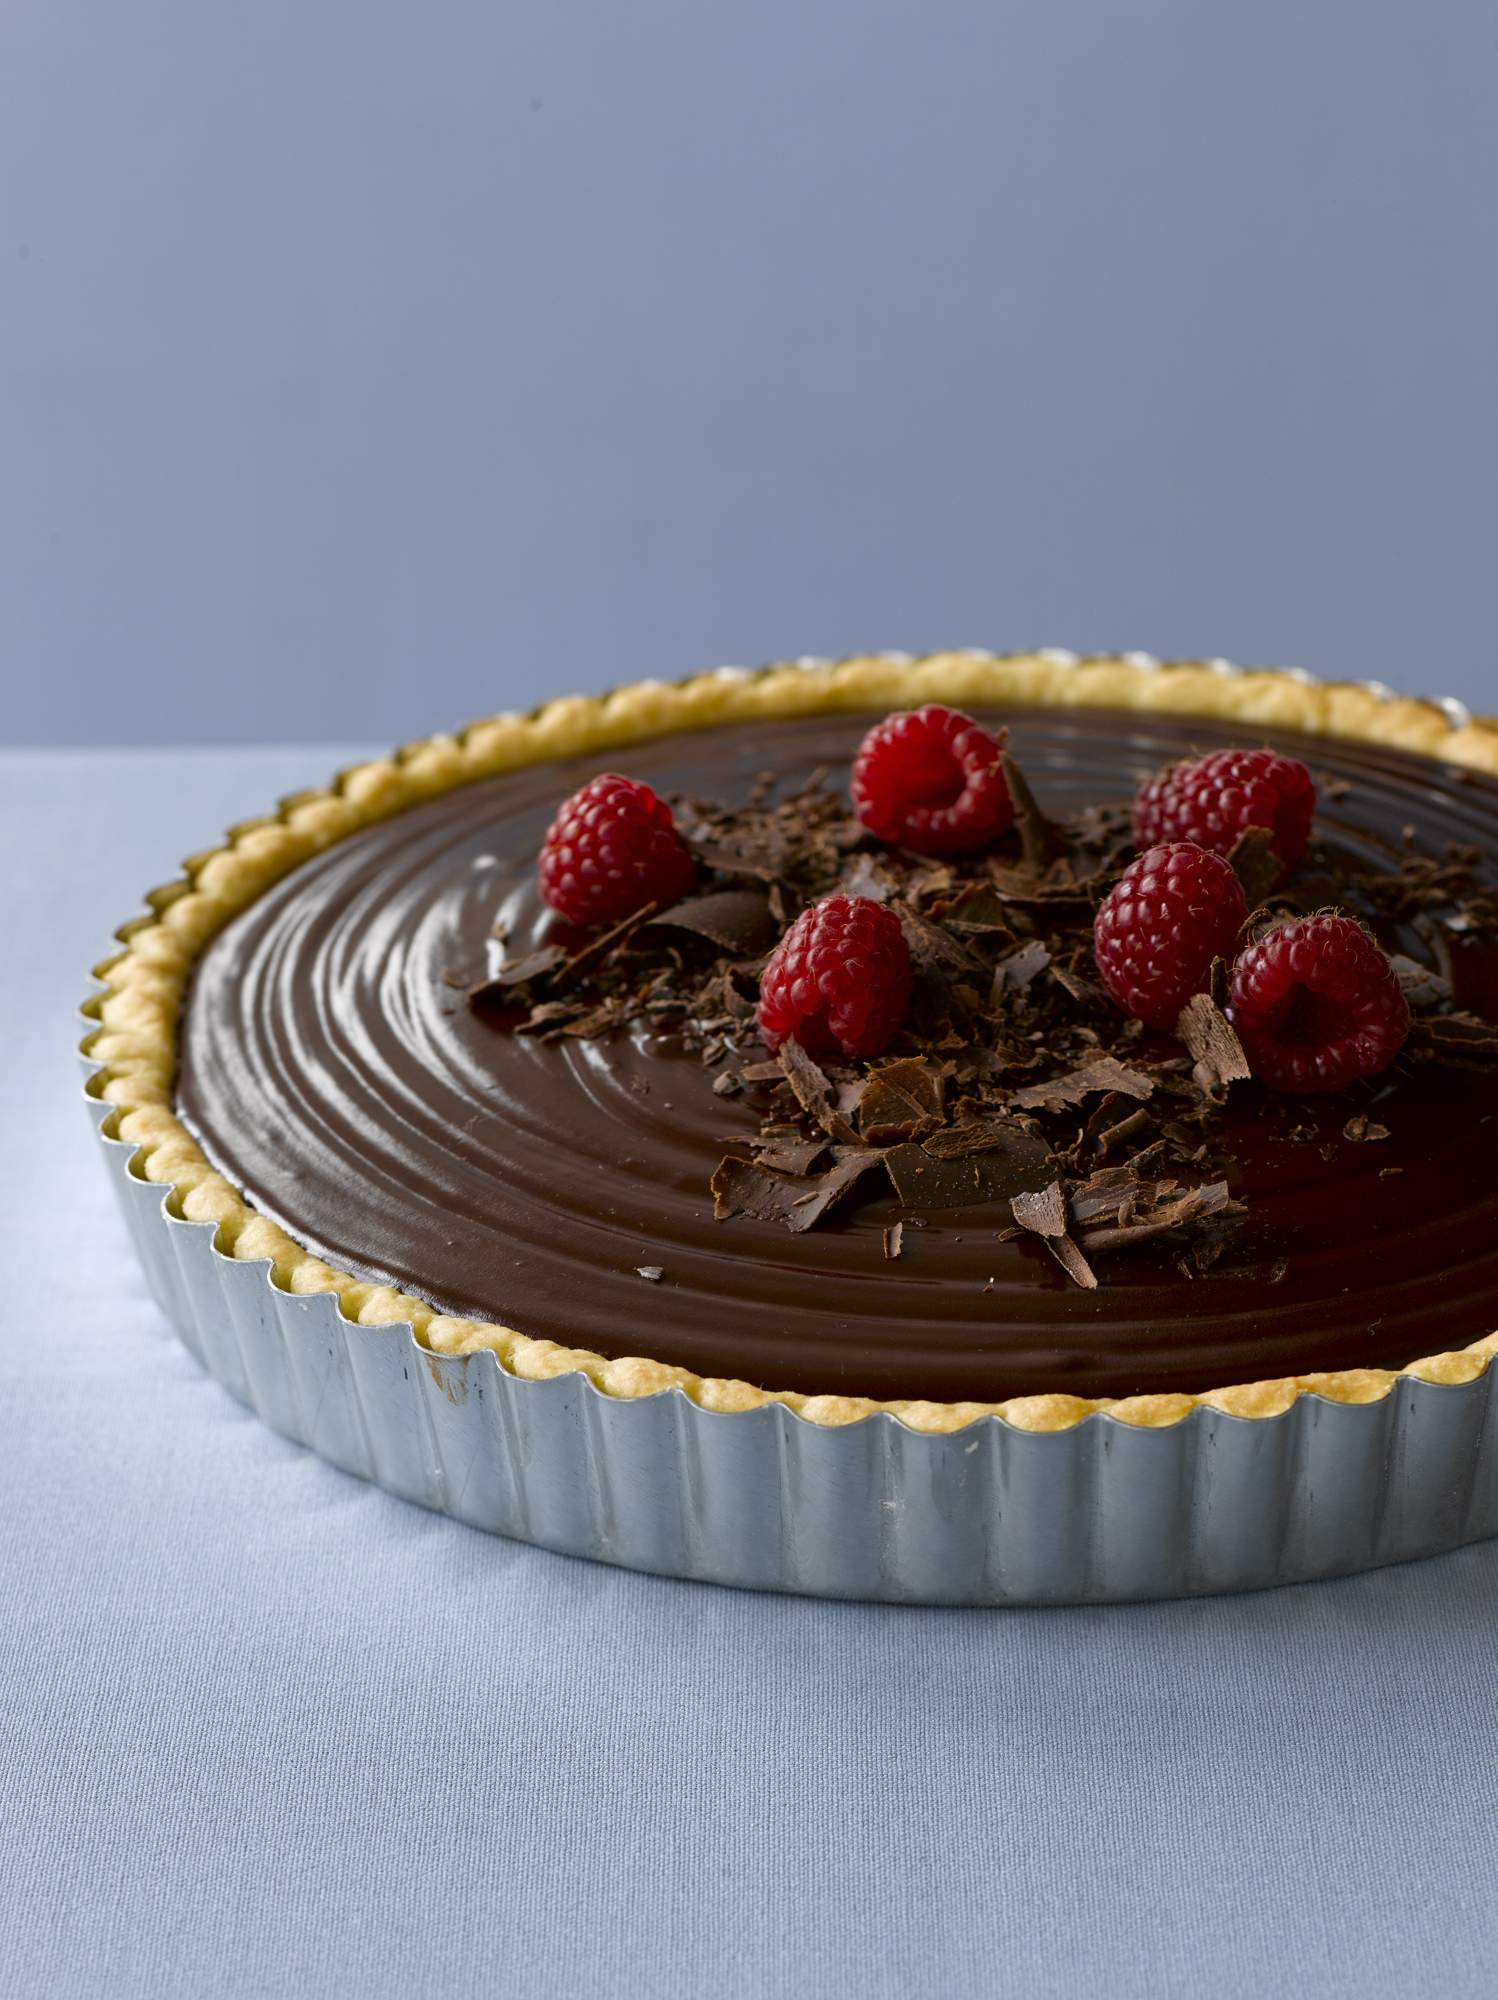
Roman Almond and Pine Nut Tart
Tarts like this one are available in many pastry shops in southern Italy in one or another form. This one derives from a tart I tasted in the late eighties at Giolitti, an elegant Roman pastry shop mostly known for its exquisite gelati. Though the Roman version is baked in a deeper pan, I like a removable bottom tart pan for this – it’s only an inch high, about half the size of a typical Roman one, but it conveys the flavor and texture of the filling perfectly without being cloying.
Makes one 10 or 11-inch tart, about 10 servings

Photo credit Charles Schiller
PASTA FROLLA
1 cup flour (spoon flour into dry-measure cup and level off)
3 tablespoons sugar
1/2 teaspoon baking powder
1/4 teaspoon salt
4 tablespoons (1/2 stick) unsalted butter, cold, cut into 8 pieces
1 large egg
ALMOND AND PINE NUT FILLING
8 ounces canned almond paste, cut into 1/2-inch cubes
1/3 cup sugar
2 large eggs
8 tablespoons (1 stick) unsalted butter, softened
2 large egg yolks
2 teaspoons vanilla extract
2 teaspoons finely grated lemon zest
1/3 cup all-purpose flour (spoon flour into dry-measure cup and level off)
1/2 cup pine nuts (pignoli)
Confectioners’ sugar for finishing
One 10-inch tart pan with removable bottom
For the dough, combine the dry ingredients in a food processor and pulse to mix. Add the butter and pulse until it is completely absorbed. Add the egg and pulse to form a ball.
Press the dough into a disk on a floured surface. Flour the dough and roll it to a 12-inch disk. Fold the dough in half and set it into the pan, lining up the fold with the diameter of the pan. Unfold the dough to fill the pan and press it well into the bottom and sides of the pan. Sever the excess dough at the rim of the pan.
Set a rack in the lowest level of the oven and preheat to 350 degrees.
Combine the almond paste and sugar in the bowl of an electric mixer. Beat on medium speed with the paddle until reduced to fine crumbs, about 2 minutes. Add one of the eggs and continue beating until the mixture turns to a heavy paste
Beat in the butter and continue beating until the butter is completely absorbed. Stop and scrape down the bowl and beater. Beat in the remaining egg, then the egg yolks, beating smooth after each addition. Stop and scrape the bowl and beater.
Beat in the vanilla and lemon zest, followed by the flour.
Use a large rubber spatula to give a final mixing to the filling and scrape it into the prepared pastry crust. Use a small metal offset spatula to spread the filling evenly in the crust.
Scatter the pine nuts all over the almond filling, gently pressing them to make them adhere with the palm of one hand.
Bake the tart until the crust is baked through and the filling is set and well colored, about 30 to 35 minutes.
Cool the tart on a rack.
Ginger Squares Addiction Warning
What could be so dangerous about an innocent bar cookie? Bake a batch and you'll see that they disappear in an instant - but that's only if you have any left to serve anyone else. Ginger lovers rejoice and everyone else, be prepared to be converted, because these are not only dangerously delicious, but they're also more than easy to prepare. An adaptation of a recipe shared by my dear friend and champion baker Kyra Effren of Dallas, I can pretty much guarantee that these will become your favorite bar cookie overnight.
Additional hints about the recipe: If you don't have/can't get any crystallized ginger, just leave it out, but it does add an extra ginger punch; if you're an avowed ginger addict, feel free to increase the quantity of it to 1/2 cup. To make chopping easier, lightly oil your knife blade and don't be tempted to use your mini-chop which will deliver a tough blob of ginger gum that won't disperse easily in the dough.
Now for the recipe:
LEMON GINGER BARS FROM BAKE!
Makes 24 2-inch bars
GINGER DOUGH

Photo courtesy of Jonathan Cheung, Appetite for Books, Montreal
2 1/2 cups all-purpose flour (spoon flour into dry-measure cup and level off)
3/4 cup sugar
2 tablespoons ground ginger (more if you like)
2 teaspoons baking powder
8 ounces (2 sticks) unsalted butter
1 large egg
1/4 cup finely chopped crystallized ginger
2 tablespoons honey
2 teaspoons finely grated lemon zest
LEMON GLAZE
2 cups confectioners’ sugar, sifted after measuring
3 tablespoons lemon juice, strained before measuring
One 9 x 13 x 2-inch pan lined with buttered foil
Set a rack in the middle level of the oven and preheat to 375 degrees.
Mix the flour, sugar, ground ginger, and baking powder in a medium bowl.
Melt the butter over medium heat and immediately add to the dry ingredients; use a large rubber spatula to stir to a smooth, shiny dough. Add the egg, crystallized ginger, honey and lemon zest and beat vigorously to make a smooth dough.
Scrape the dough into the prepared pan and use the floured palm of your hand to evenly press it over the bottom of the pan. Don’t be concerned if the dough looks greasy after pressing it onto the pan – the butter will be reabsorbed while baking.
Bake the bars until well risen, firm, and lightly golden, about 20 to 25 minutes.
While the bars are baking, use a small rubber spatula to beat the confectioners’ sugar and lemon juice together. Add water, 1/2 teaspoon at a time, if it’s too thick to spread.
As soon as the bars are baked, place a cutting board on the pan and use oven mitts to invert the hot bars to the board. Remove the pan and foil. Immediately use a small offset spatula to evenly spread the lemon glaze on the bars. It will set as the bars cool.
Use a ruler and a sharp knife to mark, then cut, 2-inch squares.
Store the squares in a tightly-covered tin or plastic container between sheets of wax paper.
Summer Vegetable Pie
This pie came about when my friend Nancy Nicholas shared some of the produce from her Long Island garden with me. I had a couple of several kinds of vegetables, and not having enough to make a full dish from just one type, I combined them. You can add and subtract at will as long as you keep to the same weight of vegetables so you’ll have the right amount of filling for the pie. This pie is excellent on its own, but it’s also a handy side dish for simple grilled meats or fish.
Makes one 9-inch pie, about 8 servings
One 9-inch piecrust made from Flaky Buttery Dough (see below), plus dough for an open-lattice top crust

3 tablespoons unsalted butter
1 medium white onion, cut into 1/4-inch dice, about 3/4 cup
1 pound young, tender zucchini, cut into 1/2-inch dice
1 pound young, tender yellow summer squash, cut into 1/2-inch dice
Fine sea salt and freshly ground black pepper
Kernels cut from 2 large ears sweet corn
1 cup half-and-half or light cream
1/3 cup finely grated Parmigiano-Reggiano
1/4 cup finely cut fresh chives
1/2 teaspoon fresh marjoram leaves, finely chopped, or 1/4 teaspoon dried
3 large eggs
Melt the butter in a Dutch oven that has a cover and stir in the onion. Cook over medium heat until the onion starts to sizzle. Then, stirring often, cook until the onion starts to color a little, 3 to 4 minutes. Stir in the zucchini and yellow squash, let them start to sizzle, then lower the heat, season the mixture lightly with salt and pepper, and stir in the corn kernels. Cover and cook until the vegetables are tender, stirring occasionally, 10 to 15 minutes.
Remove the cover, increase the heat, and let any accumulated water evaporate. Stir in the half-and-half and cheese. Cook, stirring often, until the mixture comes to a boil.
Taste for seasoning (the filling should be slightly overseasoned before the final step of adding the eggs) and stir in the herbs. Cool the filling to room temperature.
Set a rack at the lowest level in the oven and preheat to 400°F.
Whisk the eggs in a medium bowl and gently fold them into the cooled filling. Pour the filling into the piecrust and set the lattice top on the pie.
Bake the pie for 15 minutes, then lower the temperature to 350°F. Continue baking until the crust is deep golden and the filling is set, about 30 minutes longer.
Cool the pie on a rack and serve it at room temperature.
FLAKY BUTTERY DOUGH
Makes enough for 2 single-crusted pies or 1 double-crusted pie
2 cups unbleached all-purpose flour (spoon into dry-measure cup and level)
1/2 teaspoon fine sea salt
1 teaspoon baking powder
8 ounces/2 sticks unsalted butter, chilled and cut into 1/2-inch pieces
2 large eggs
Combine the flour, salt, and baking powder in the bowl of a food processor; pulse several times at 1-second intervals to mix.
Add the butter pieces and pulse again 3 or 4 times. Use a metal spatula to scrape the side of the bowl and mix the butter pieces throughout the flour.
Pulse again 3 or 4 times.
Using a fork, beat the eggs to break them up, and add them to the bowl. Pulse again until the dough almost forms a ball; avoid pulsing too much, or the pieces of butter needed to make the dough flaky will become too small.
Invert the dough onto a lightly floured work surface, carefully remove the blade, and quickly press the dough together.
Divide the dough into 2 pieces, form them into thick disks, and wrap each one in plastic. Chill the dough for a couple of hours before rolling.
PLANNING AHEAD: This dough keeps well in the refrigerator for up to 3 days.
Blueberry Crumb Cake

Photo credit: Charles Schiller
In New York City where I live, blueberry season is fairly long, since we have blueberries form the south, then New Jersey, then finally from Maine and Michigan, consecutively throughout several months. I love this type of cake and blueberries are the perfect fruit for it – they melt to a jam-like consistency between the cake batter and crumb topping while the cake is baking.
Makes one 9 x 13 x 2-inch cake, about 24 2-inch squares
CRUMB TOPPING
2 cups unbleached all-purpose flour (spoon flour into dry-measure cup and level off)
1 teaspoon baking powder
1/3 cup sugar
1/3 cup light brown sugar
1/2 teaspoon cinnamon
1/4 teaspoon nutmeg
12 tablespoons (1 1/2 sticks) unsalted butter, melted
CAKE BATTER
16 tablespoons (2 sticks/8 ounces) unsalted butter, softened
1 1/2 cups sugar
3 large eggs
2 teaspoons vanilla extract
2 1/2 cups unbleached, all-purpose flour
2 teaspoons baking powder
3 egg yolks
1/4 cup milk or buttermilk
1 quart blueberries, rinsed, picked over and dried
One 9 x 13 x 2-inch pan, buttered and lined fully (bottom and sides) with parchment or foil
Set a rack in the middle level of the oven and preheat to 350 degrees.
For the crumb topping, mix the flour, baking powder, sugars, cinnamon and nutmeg in a bowl. Melt the butter and stir it in evenly. Rub the mixture to coarse crumbs by hand.
In a large mixer bowl, beat the butter and sugar until soft and light. Add the eggs one at a time, beating smooth after each addition. Beat in the vanilla.
Stir together the flour and baking powder and stir add to the batter in three additions, alternating with the yolks and milk, beginning and ending with the flour. Spread the batter evenly in the prepared pan.
Scatter the blueberries evenly over the batter, pressing them in gently, then top with the crumbs.
Bake the cake about 40 minutes until batter is firm and crumbs are well colored. Cool the cake in the pan on a rack. Cut the cooled cake into twenty four 3-inch squares. Remove the squares from the pan to a platter.
Serving: This a great breakfast cake and also transports well, right in the pan, to a picnic.
Storage: Wrap the cooled cake in plastic wrap and keep it at room temperature. Freeze for longer storage. Defrost cake and bring it to room temperature before serving.
Chocolate Eminence
This elegant cake is perfect for the most important occasion and makes a spectacular dinner-party dessert. And it can be entirely made, except for the cocoa powder finish on top of the cake, the day before.

One 9-inch cake, about 12 servings
Cake Batter
1/4 cup water
6 ounces bittersweet chocolate, cut into 1/4-inch pieces
6 large eggs, separated directly into 2 mixer bowls
1/2 cup sugar
2 teaspoons vanilla extract
Pinch of salt
1/3 cup blanched (skinless) hazelnuts, lightly toasted and chopped but not ground
Milk Chocolate Mousse
4 large egg yolks
1/4 cup sugar
1/4 cup dark rum
12 ounces milk chocolate, melted and cooled
1/2 cup heavy whipping cream, whipped to a soft peak
Finely chopped toasted hazelnuts for the side of the cake; Dutch process cocoa for the top
3 9-inch round layer pans buttered and the bottoms lined with buttered parchment
Set a rack in the middle level of the oven and preheat to 350 degrees.
For the layers, melt the chocolate and water in a large mixing bowl and set over a pan of gently boiling water, stirring occasionally until melted. Cool. Whisk the yolks by hand in the bowl of an electric mixer and whisk in half the sugar and the vanilla. Place on mixer with whisk and whip of medium-high speed until lightened, about 3 minutes. Scrape the yolk mixture over the melted chocolate but don’t fold it in.
Combine the egg whites and salt in a mixer bowl and whip on medium speed until white, opaque, and beginning to hold their shape. Increase the speed to medium-high and whip in the remaining 1/4 cup sugar a tablespoon at a time, until the egg whites hold a firm peak. Scrape a quarter of the whites over the yolk and chocolate mixtures in the bowl and stir together. Fold in the remaining egg whites.
Divide the batter evenly among the prepared pans and use a small offset spatula to spread it evenly. Scatter a third of the chopped hazelnuts on each layer.
Bake the layers until risen, fallen, and firm, about 12 to 15 minutes. As soon as you take them out of the oven, invert a layer to a cardboard, and lift off the pan, leaving the paper on the bottom. Replace the pan with another cardboard and invert again. Remove the top cardboard and let the layer cool on the bottom cardboard. Repeat with the remaining layers. Wrap the layers in plastic once they have cooled.
Before starting the filling, have the layers and a medium offset spatula and a cardboard to assemble the cake on ready nearby. For the filling, whisk the egg yolks by hand in a medium mixing bowl. Whisk in the sugar and the rum. Place the bowl over a pan of gently boiling water and whisk until thickened, about 3 minutes. Remove the bowl from the pan and continue whisk until cooled to room temperature. Scrape the yolk mixture over the melted chocolate but don’t mix it in; quickly fold in the cream until the filling is smooth and can hold its shape.
Invert one of the layers (nut side down) to a cardboard, peel off the paper, and spread with a third of the filling. Repeat with a second layer and another third of the filling.
Invert the last layer to the filling and peel off the paper. Cover the entire outside of the cake with a thin coat of the remaining filling. Press the chopped hazelnuts against the side of the cake.
Dust the top of the cake with cocoa and use a serrated knife to trace a lattice pattern into it.
Keep at a cool room temperature until ready to serve. For advance preparation, don’t finish the top of the cake, wrap in plastic and chill. To serve, unwrap, bring to room temperature, and finish as in step 9.
Nick Malgieri’s Best and Easiest Focaccia
454 grams warm tap water

Photo credit: Jill Sandique
Pinch of sugar
7 grams/2 1/2 teaspoons dry yeast (I use SAF Instant)
75 grams fruity olive oil
675 grams unbleached bread flour
2 teaspoons salt
Coarse salt for topping, plus any flavorings below
Measure water into a mixer bowl and whisk in sugar and yeast. Cover bowl and wait a few minutes until the yeast foams. Whisk in the oil.
Thoroughly stir in the flour and salt, making sure that no flour is stuck to the side of the bowl.
Mix on low speed with dough hook for 3 minutes. Stop mixer, cover bowl, and let dough rest 15 minutes.
Uncover bowl and mix on medium speed for 3 minutes. The dough will still be soft and sticky.
Turn the dough into an oiled bowl and turn over so that the top is oiled. Cover and let ferment until it is 50% over its original size.
Scrape the dough to a floured surface and fold one side over the center and the other side over them; roll down from the top. Repeat folding and rolling.
Place back in the oiled bowl and turn dough to oil top. Let the dough ferment until it is fully double.
Seat a rack in the lowest level of the oven and preheat to 425 degrees.
Generously oil a half-sheet pan and scrape the dough out onto it. Turn the dough over so that the top is oiled, and gently press it into the pan using fingertips to dimple the dough. If the dough resists, wait 10 minutes and finish pressing it into the pan. Let the focaccia proof for 20 minutes – it will not double in bulk. Before topping, gently dimple it again using fingertips.
Drizzle the focaccia with olive oil and sprinkle with coarse salt.
Bake the focaccia until it is risen and deep golden (use a griddle spatula to lift a corner to see how well done the bottom is), about 35 to 45 minutes.
Immediately slide to a rack to prevent sogginess.
Hints: Season the pan by brushing w olive oil and baking at 375 degrees for 15 minutes to prevent sticking. Cool, wipe, and oil again before placing dough.
Add 2 to 3 tablespoons chopped rosemary or sage at the beginning of step 4.
Top with rows of halved cherry tomatoes and halved green or black olives after the oil and salt.
FOCACCIA PUGLIESE: Divide the dough in half (two 600-gram pieces) and press into two oiled 2-inch deep 9-inch round pans that have been seasoned as above. Top with 1 1/2 pounds thinly sliced white onions cooked until very soft in 3 tablespoons olive oil. Salt the onions generously or the topping will be bland.
Baking Bread

Best and Easiest Homemade Bread
The other day I decided to try a recipe from my bread book (Nick Malgieri’s Bread: Kyle Books, 2012—it may or may not be still in print). Before looking for ingredients I started thinking about the six months or so that I spent working on this book almost full time. Working out and adapting recipes in baker’s percentages, cups, pounds and ounces, and metric sometimes took hours at the calculator before I even started writing.
Once I wrote a recipe, I tested it multiple times, sometimes having to go back to the calculator to change the quantity of an ingredient. When the writing and testing were finished, I realized that it was the single most difficult thing I’ve ever done. And I even made every bit of bread that’s pictured in the book—even the breadcrumbs!
I’ve made many of the recipes in the book since it was published, but I never got into the habit of frequently baking bread. So I took out the book and followed the recipe exactly. Eureka! I finally realized why all the people who make these bread recipes turn out loaves that look better than mine. I’m guilty of skimming an ingredient list and then running to the kitchen without reading the instructions. This time I followed my own instructions to the letter. The process was enjoyable, mood elevating, and delicious. Try this recipe, or as an old friend frequently used to say, “Bake something; you’ll feel better.”
Comfort Baking
Who isn’t a little on-edge these days as a health crisis looms and we are all staying in to avoid it? We need a distraction, or else we’ll have to get back to working on our taxes…
I don’t know about you, but I always feel better both during and after baking something. Measuring ingredients and carefully mixing them, followed by pleasant anticipation while the recipe is baking, all contribute to a general sense of wellbeing.

Here are a couple of recipes that I turn to often. The first, a real Scottish shortbread cookie, is a recipe I’ve been making since the late eighties. I had gone for the first time to teach at a lovely kitchenware store and cooking school called the Parisian Pantry in Springfield, Missouri. Peggy, the owner, a native of Scotland, brought me to her home, where I would be staying with her and her husband. As soon as I was settled, we had afternoon tea with some exquisite shortbread cookies. Peggy was kind enough to share the recipe, which I hurriedly wrote down about three minutes after tasting the first cookie.
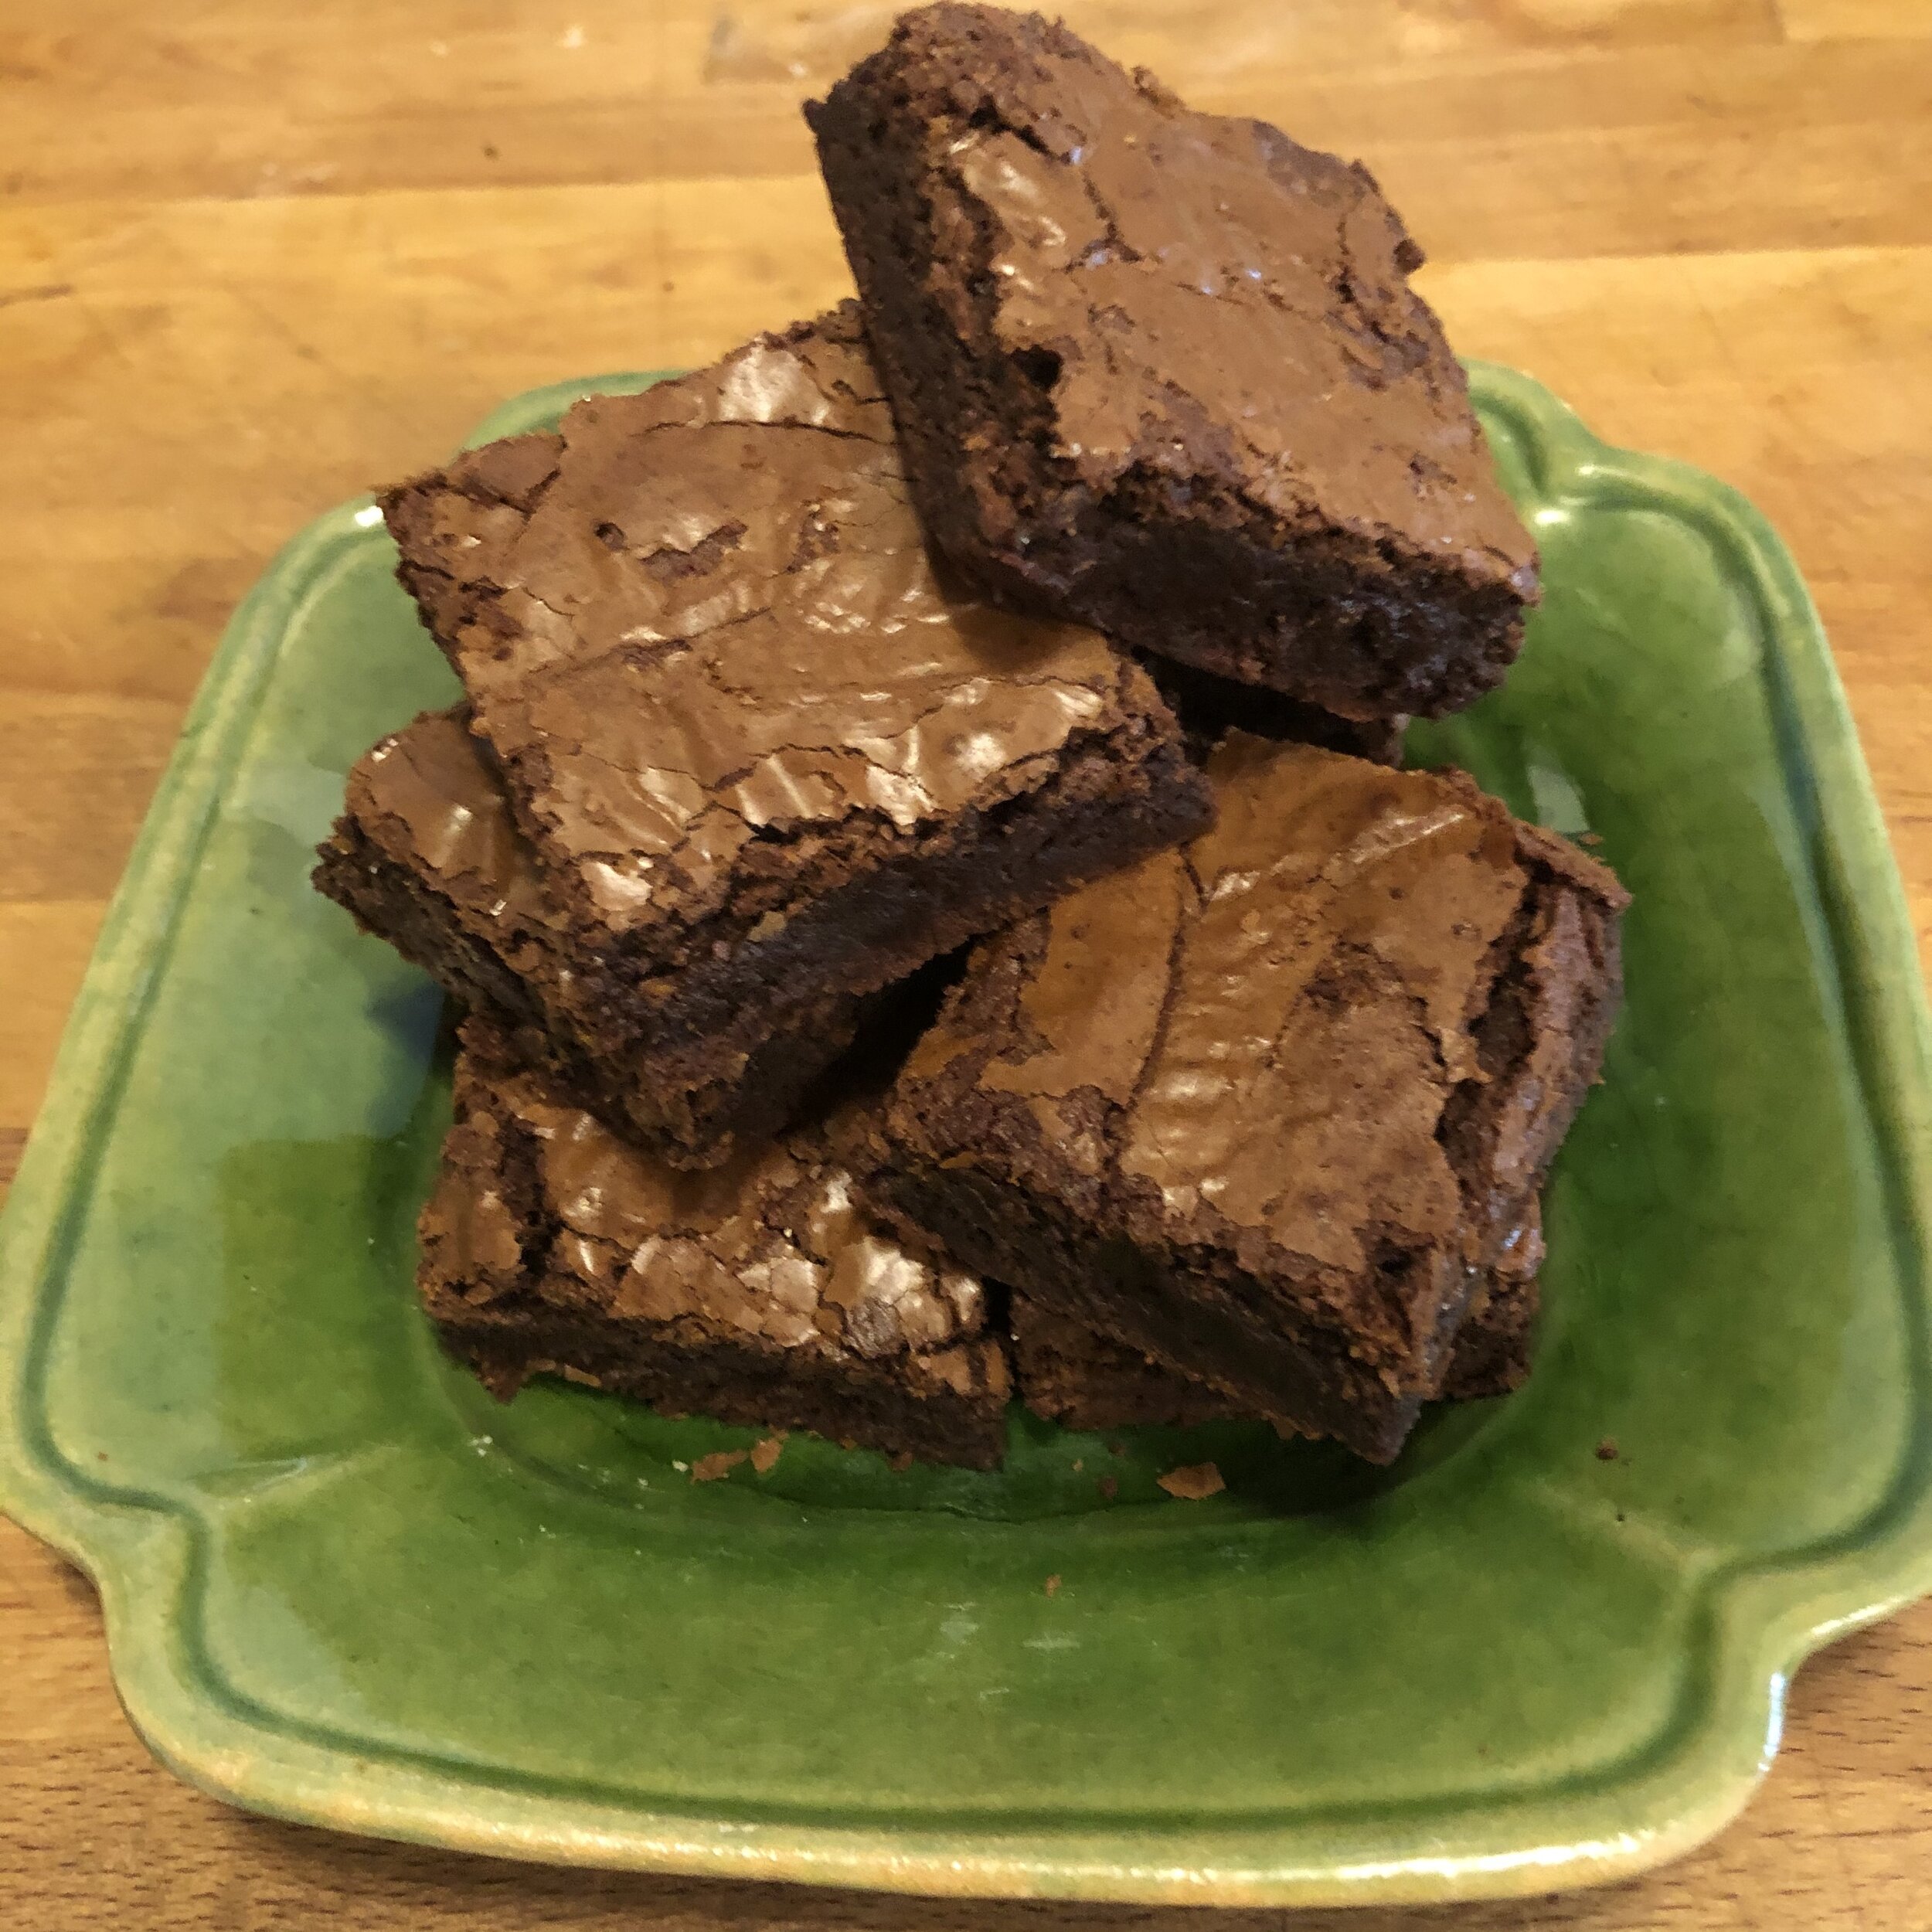
The second is by far my most requested recipe of all time, Supernatural Brownies. In case you haven’t read the story elsewhere, here goes: A friend asked me to prepare a couple of chocolate desserts for a large party she was having. I decided to make a brownie recipe that I had adapted from a large-quantity commercial recipe. When I broke it down to a home baking quantity, the brownie batter fit perfectly in a 10 x 15-inch jellyroll pan. For my friend’s party, though, I needed to make two half-sheet pans, so I doubled the recipe and increased it further by 50% for the larger pans. The batter was safely in the pans and in the oven for about 10 minutes when I looked back at my notes and realized I had doubled the flour but failed to make the 50% increase. Ugh—too late to take the pans out of the oven. I decided to bake them and nothing short of a miracle occurred: I tasted a bit of the baked batter after it had cooled and it was even better then the original.
Latest Book

How to Bake contains hundreds of recipes for cakes, cookies, pies, tarts, breads, pizzas, muffins, and other sweet and savory items.
This new version of my third book has been fully revised and updated to reflect the way we bake now.