Lattice-Topped Apple Tart
This is so much more practical to prepare and serve than a standard apple pie baked in a sloping sided pie pan. It’s free-standing on a platter for serving and only needs to be cut into wedges, with none of the sometimes destructive digging underneath the bottom crust to extract wedges from the other type of pan. It’s also much more elegant looking than a plain apple pie. I like to use a little flour to thicken the juices of an apple filling such as this one–it’s easy to do (just mix the flour with the sugar) and, unless you use too much, it provides just the slight thickening needed so the juices in the baked pie aren’t watery. Dicing the apples makes them bake through more quickly than cutting them into wedges, plus it makes the filling less bulky when placed in the bottom crust, creating only a small gap between the filling and top crust after the tart is baked.
Makes one 10-inch double-crusted tart, about 10 servings
Apple Filling
3 pounds tart apples, peeled, halved, cored and cut into 1/2-inch dice
1/2 cup sugar
1/4 cup light brown sugar
3 tablespoons all-purpose flour
1 teaspoon ground cinnamon
2 tablespoons cold unsalted butter
Finishing
2 tablespoons sugar
One 10-inch unbaked tart crust, edges untrimmed, and a square of dough for the top crust, both made from Flaky Pastry Dough (see below)
Set a rack in the lowest level of the oven and preheat to 375˚F. Slide a sheet of aluminum foil onto the bottom of the oven to catch drips when the filling comes to a simmer close to the end of the baking time.
Put the apples in a large bowl and mix the sugars, flour, and cinnamon in a small one. Scatter 2 tablespoons of the sugar mixture onto the bottom of the tart crust. Scatter the rest over the apples and use a large rubber spatula, repeatedly digging upward from the bottom of the bowl, to mix.
Scrape the filling into the prepared crust and redistribute the apple pieces so that the top of the filling is lever rather than domed. Dot the filling with shreds of the butter.
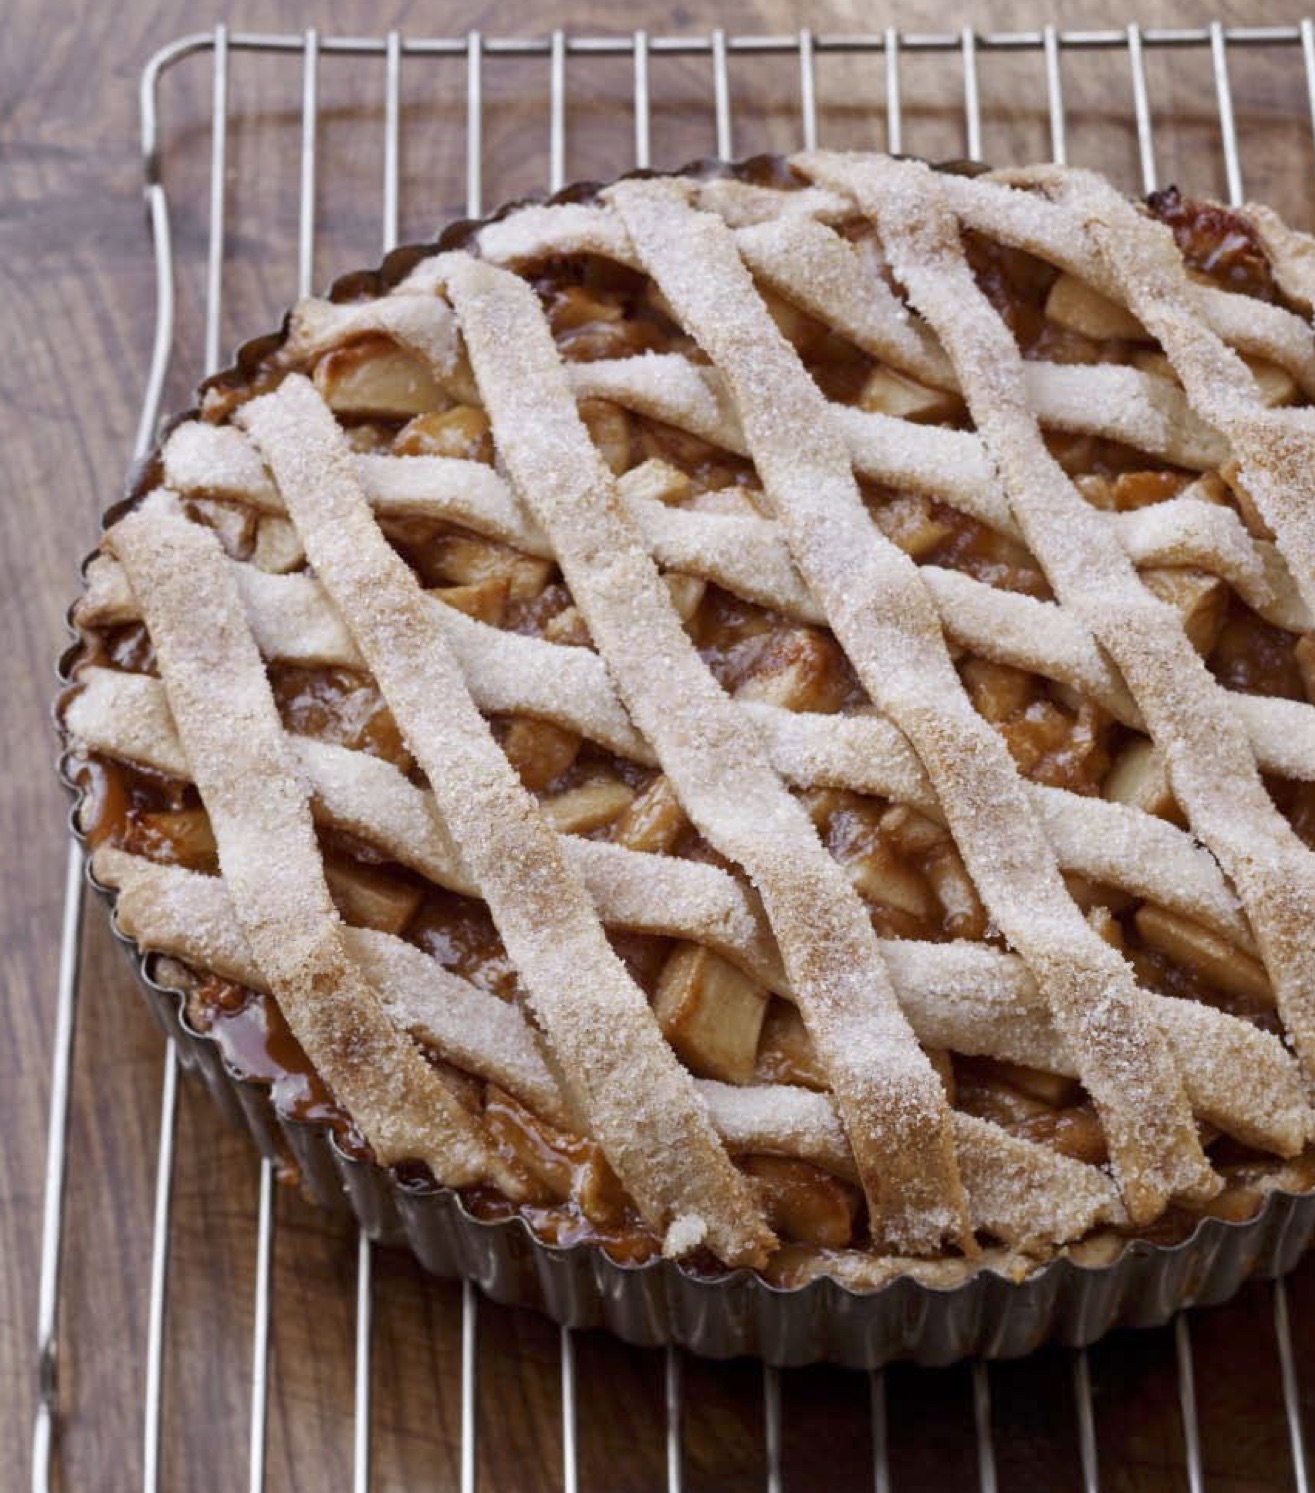
Use some water and a brush to moisten the extra dough at the edge of the pan. Use a pizza wheel or serrated pastry wheel to cut the square of dough into 10 1-inch wide strips. Place 5 of the strips parallel and equidistant from each other on the filling, letting the ends of the strips touch the moistened area of the bottom crust. Place the next 5 strips at either a 45- or 90-degree angle to the first strips.
Use moistened fingers to press the ends of the strips gently against the overhanging edge of the bottom crust. Use the back of a knife to trim the overhanging dough even with the rim of the pan.
To finish, gently brush a little water on the strips of dough and scatter on the sugar. Bake the tart until the crust is well colored and baked through and the filling is gently bubbling, about 45 to 55 minutes.
Cool the tart on a rack and unmold it. Slide it from the pan bottom to a platter to serve.
Flaky Pastry Dough
Flaky dough makes a wonderful container for many sweet and savory fillings. Its fragile texture after baking is more than equaled by its subtle buttery flavor, which always enhances but never competes with delicate fillings.
Makes about 18 ounces dough, enough for two 10-inch tart crusts or one double crust tart
2 cups all-purpose flour (spoon flour into dry-measure cup and level off)
1/2 teaspoon salt
1 teaspoon baking powder
12 tablespoons (1 1/2 sticks) unsalted butter, cold and cut into 12 pieces
2 large eggs
To mix the dough by hand, combine the flour, salt, and baking powder in a medium bowl and stir to combine.
Cut each piece of butter into 4 or 5 smaller pieces and add the pieces to the bowl. Using both hands, palms upward, reach under the dry ingredients to the bottom of the bowl and lift them up through the contents of the bowl several times to distribute the pieces of butter evenly.
Use your fingertips to pinch the pieces of butter into smaller pieces, alternating that with rubbing the mixture between the palms of your hands, as well as occasionally repeating step 2.
Continue rubbing in the butter until the largest pieces are no more than 1/4 inch across, but the whole mixture is still cool and powdery.
Add the eggs and use a fork to break them up. Move the bowl back and forth on the work surface while you stir from the bottom up with the fork until the dough is almost completely mixed.
Invert the dough to a floured work surface and gently press it into a consistent mass. Continue with step 11.
To mix the dough in a food processor, combine the flour, salt, and baking powder in the bowl fitted with the metal blade. Pulse several times to mix.
Add the butter and pulse repeatedly at 1-second intervals until the butter appears in small pieces as in step 4.
Add the eggs and pulse again just until the dough almost forms a ball—pulsing too much at this point will incorporate the butter smoothly and cut down on flakiness.
Invert the dough to a floured work surface and carefully remove the blade. Gently press the dough into a cohesive mass.
Divide the dough in half, then flatten each half into a disk. Wrap in plastic and refrigerate until firm or as long as 3 days.